Setting Up a Court
When onboarding a new court to CottFile, follow these steps in order. Each step builds on the previous one — for example, you need to create case types before you can assign fees to them.
Step 1: Create or Verify the Court Record
Navigate to Courts in the Admin Panel.
- If your court is already listed, click on it to verify the details.
If not, click Add Court and enter:
- Court Name (e.g., "19th Judicial District Court")
- Parish (e.g., "East Baton Rouge") — in Louisiana, courts are organized by parish
- E-Filing Enabled — toggle this on when you're ready to accept electronic filings
Add Court Locations — if your court operates from multiple buildings or branches, add each location with its name and address.
Louisiana courts: The system uses "Parish" rather than "County." This is configurable per court for jurisdictions outside Louisiana.
Step 2: Add Case Types
Navigate to Case Types in the Admin Panel.
Case types define the categories of cases your court handles. The page shows a tree view: Court → Case Types → Sub-Types.
- Select your court from the tree.
Click Add Case Type and enter:
- Name (e.g., "Civil", "Family", "Criminal", "Juvenile", "Probate")
- Code (e.g., "CV", "FA", "CR") — a short code used in case numbering
Add Sub-Types (optional) — for case types that have categories. For example, under "Family" you might add "Divorce", "Custody", "Adoption", "Child Support".

Tip: Start with the case types that represent the majority of your filings. You can add more later without disrupting existing filings.
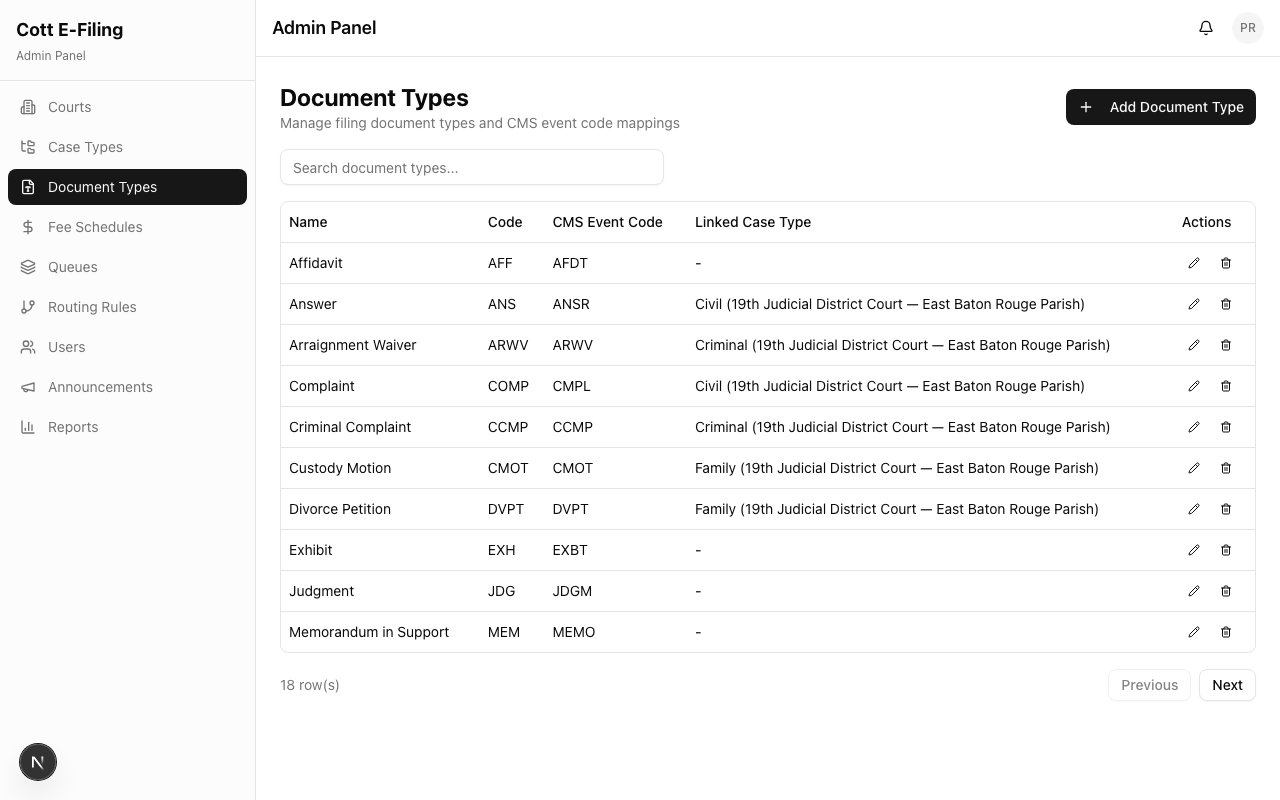
Step 3: Add Document Types
Navigate to Document Types in the Admin Panel.
Document types define what kinds of documents filers can upload. These are tied to case types so filers see the relevant options.
Examples of document types:
- Petition, Motion, Brief, Affidavit, Exhibit, Subpoena, Order, Judgment, Notice, Stipulation
For each document type, specify:
- Name
- Which case types it applies to
Step 4: Configure Fee Schedules
Navigate to Fee Schedules in the Admin Panel.
Set up the filing fees for your court. Fees can be configured by:
- Court — different courts may have different fee structures
- Case Type — civil filings may cost differently than family filings
- Document Type — some documents may have additional fees
See Configuring Filing Fees for detailed instructions.
Step 5: Create Clerk Queues
Navigate to Queues in the Admin Panel.
Queues define the stages that filings pass through during clerk review. A typical queue setup:
- New Filings — where submitted filings first arrive
- Under Review — where clerks actively review filings
- Accepted — filings that have been approved
- Rejected — filings sent back to filers
You must:
- Create at least one queue
- Mark one queue as the default — this is where new filings land
See Setting Up Queues & Routing for detailed instructions on queue configuration and automatic routing.
Step 6: Add Staff Users
Navigate to Users in the Admin Panel.
Create accounts for clerks, judges, and other court staff. Assign each user to:
- The correct court
- The appropriate role (Clerk, Judge, Judicial Staff, Court Admin)
See Managing Users for details.
Step 7: Publish an Announcement (Optional)
Navigate to Announcements in the Admin Panel.
Consider publishing a welcome announcement to inform filers that your court now accepts electronic filings. This appears on every filer's dashboard.
Verification Checklist
Before going live, verify:
- [ ] Court record exists and e-filing is enabled
- [ ] Court locations are configured
- [ ] Case types and sub-types are set up
- [ ] Document types exist for each case type
- [ ] Fee schedules are active and amounts are correct
- [ ] At least one queue exists and one is marked as default
- [ ] Routing rules are configured (if using automatic assignment)
- [ ] Staff users are created and assigned to the court
- [ ] A welcome announcement is published for filers
Test It
- Create a test filer account (or use an existing one)
- Submit a test filing for your court
- Verify the filing appears in the clerk queue
- Accept and reject test filings
- Confirm the filer receives notifications and can view results